Adding Knoxnl (KNOXSS) to Burp

Hi, I’m a Penetration Tester. My job is to intentionally make applications do things they’re not supposed to—finding flaws and exploiting them to ensure they’re secure. I specialize in Web, API, Android, and iOS security.
Open Burp > Extensions
Install Piper
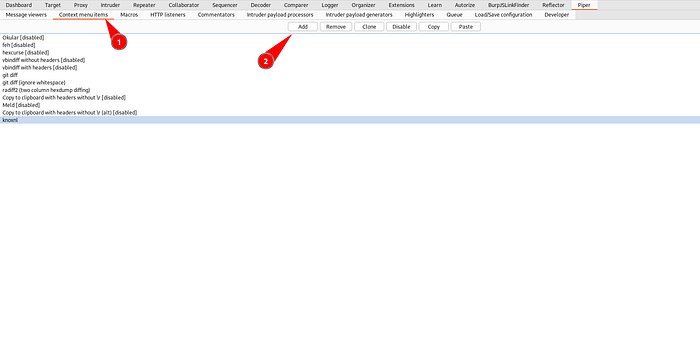
Go to Piper > Context menu items
Click on Add Button and Enter Name as “knoxnl”
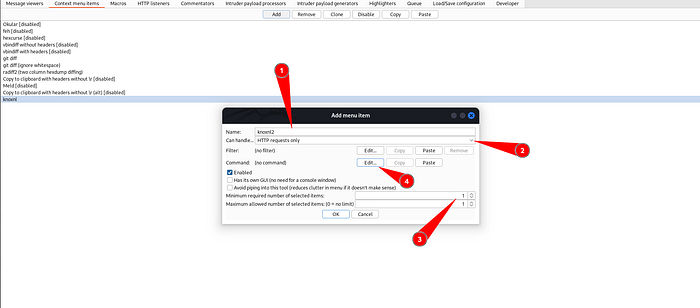
In the Add menu item dialog box, enter the Name as
knoxnland change the Can handle... drop down toHTTP requests only.Change both the Minimum required number of selected items and Maximum allowed number of selected items values to
1Click Edit Button on Command and the Command invocation editor dialog box should be displayed
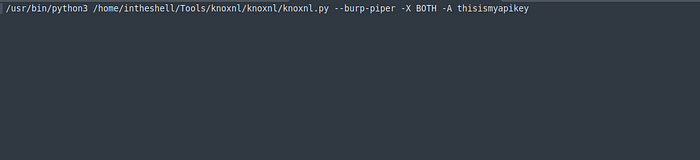
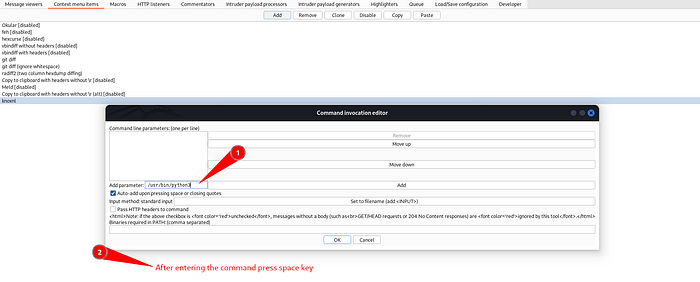
Now on the “Add Parameter:” input field you’ll need your python3 installed binary, your knoxnl.py file and commands and arguments.
Here’s How you do it:
Enter “which python3” on terminal and you’ll get
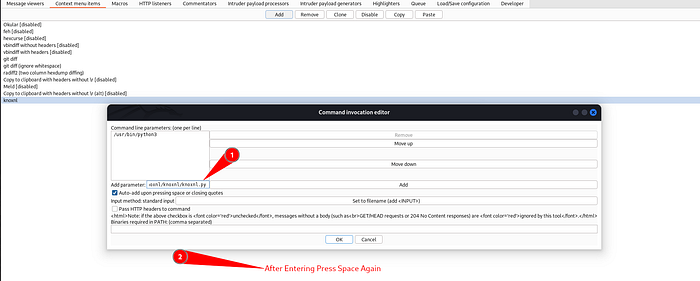
/usr/bin/python3Go to knoxnl directory (https://github.com/xnl-h4ck3r/knoxnl)
Search for python file (knoxnl.py) and enter pwd in your terminal and you’ll get
/home/intheshell/Tools/knoxnl/knoxnlsomething like this (may deffer according to your folder)Now enter Commands such as
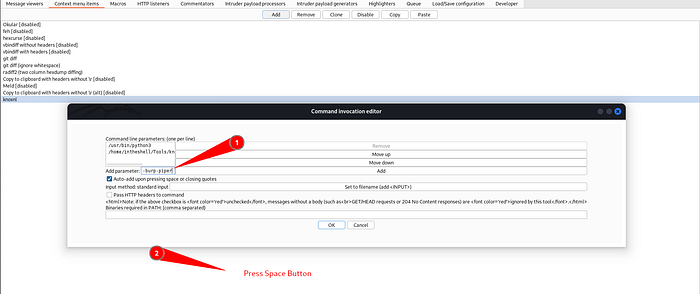
--burp-piper-XBOTH-A your_knoxss_api_keyGet your api key from https://knoxss.me/
Remember to enter one command per line . For example see the image to understand it properly.
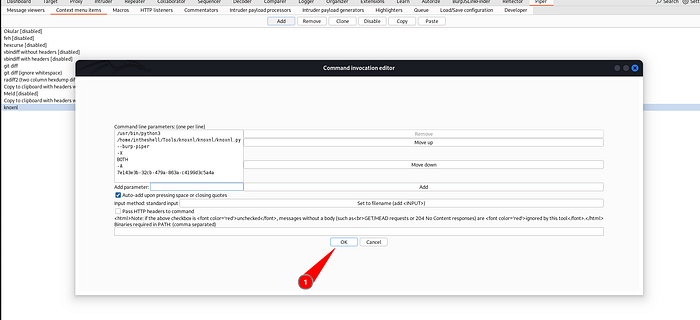
Click the OK button on the Command invocation editor dialog box.
Click the OK button on the Edit menu item dialog box.
Now It’s Ready

Now to scan for XSS, right click on a Request and select Extensions -> Piper -> Process 1 request -> knoxnl.
A window should open with the title Piper — knoxnl. This Piper window stays blank until the command is complete (which could be up to 180 seconds — the default value of
-t/--timeout).
So Just wait and When complete, it should show the knoxnl output in the same way as on the command line version as shown below.
Just close the window when you have finished.
All the references are taken from
https://github.com/xnl-h4ck3r/knoxnl#using-in-burp-suite-proxy##Note: The API key shown above is a Randomly generated Key.